

Let's talk about volume clean-up, vintage fuzzes and buffer pedals, and how everything interacts together.
shopping_cart
0
Latest posts
-
 Master fuzz clean-up like a pro !Read more
 -
 Circuit Analysis : Electro Harmonix LPB1Read more
Let's dive deep into electronics and explore the Electro Harmonix LPB1 and Screaming bird at once !
-
 Master the art of reampingRead more
Let's talk about how to use a DI box and a reamp box and what they are doing under the hood.
-
 How to record an electric guitar : all about microphonesRead more
All you ever wanted to know about recording your electric guitar amplifier with microphones, but were afraid to ask !
-
 Guitar preamps: are they a scam?Read more
Understand what really is a guitar preamp pedal, its difference with a studio preamp and an overdrive pedal, and how...
-
 The art of stacking effects pedalsRead more
Discover how to master pedal stacking with overdrives, saturations, compressors, and time-based effects. Learn the...
-
 The ultimate power supply guideRead more
Let's explore what make a good power supply, how to choose one and how to read their labels to prevent frying up your...
-
 Flanger is the BEST modulation pedalRead more
Hot take : flanger is definitely the best modulation effect ever invented. I can have it replace a phaser, a chorus...
-
 The ultimate guide about modulation effectsRead more
Modulation effect pedals form a distinct category of guitar pedals. What are the differences between a chorus, a...
-
 Choosing guitar cables: enhance your sound qualityRead more
Learn how guitar cables influence your tone. From capacitance to shielding and tips to maintain signal clarity,...
Blog categories
Search in blog
The art of stacking effects pedals
Hello and welcome to TAMPCO’s workshop! You might already be used to stacking pedals to get the tone you’re looking for, but have you ever thought about the right way to do it? Of course, there’s no universal rule, but I’d still like to dive into the topic of stacking with you. What is it, and how do you stack properly? That’s what we’re going to see today.
1. Stacking and gain staging
To stack literally means to pile up. The basic idea is simple: activating two or more effects of the same type in sequence, usually gain effects. By combining them, the guitar sound is enriched with a particular color and texture.
Very often, we’re searching for a way to reproduce the sound of a cranked tube amp at low volume. Many pedals claim to provide the ultimate solution to this problem, and some dedicated tools like power attenuators can indeed make amps work without disturbing the neighbors.
However, these are not really universal answers. The reason tube amps sound so rich is mainly the way the different tubes are arranged. Each stage brings a bit of saturation and pushes the next one harder, all the way to the power tubes. Each contributes its own character, and filters and tone controls refine the overall response.
It’s all about stacking gain stages: several light saturations will usually sound much better than one single pedal maxed out! This is the true essence of stacking: learning to manage gain and volume sequencing to get the ideal response. In an amp, the circuit is fixed, often with just one gain, one volume, and maybe a master. When stacking pedals, it’s up to us to adjust multiple gains and volumes. This is what we call gain staging. Very often, lowering the gain and stacking multiple pedals reduces noise and preserves excellent dynamics!
2.Only for gain?
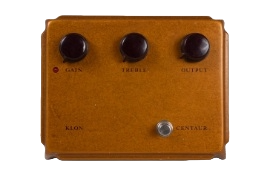
As you’ve guessed, stacking mainly applies to overdrive, distortion, and boost pedals. On this point, I really recommend experimenting with your current effects by starting with the tightest and most aggressive, and finishing with the one that has the widest bandwidth and the least saturation. For example, my Tone Oven is ideal at the end of the chain for this reason. It brings a certain smoothness that complements the gain pedals placed earlier. This is the strength of transparent overdrives in general, and explains why so many guitarists keep a Klon Centaur always on at the end of their chain, acting as a preamp for coloration.
Modulation stacking is less common for a simple reason: it tends to make the sound muddy and undefined. Few modulation pedals work well together! More often than not will they be placed in parallel, but I'm keeping this topic for another blog post. On the other hand, stacking delay and reverb adds real depth: the reverb acts as a background wash, while the delay keeps listeners’ ears engaged. In ambient and shoegaze, stacking two reverbs can create virtually infinite spaces, like caves or cathedrals where the sound never seems to fade. Finally, combining two delays generates rhythmic patterns impossible to achieve with a single delay.
The compressor is also a great effect for stacking—it’s no coincidence that Origin Effects makes the Cali76 Stacked! Using two compressors in a row allows precise control over dynamics. The first can be a slow compressor to thicken the tone, followed by a limiter to manage transients. Conversely, a fast compressor for pumping effects and a slower one as a leveler will give a more polished, almost “studio” sound, perfect for bass or clean guitar tones à la Cory Wong (Vulfpeck). Nothing stops you from stacking saturation and compression either, to precisely manage sustain.
3. The importance of order
As I just mentioned with compressors, order is crucial! Very often, you’ll see a preamp, a boost, or a transparent overdrive placed at the end of the chain as an “always-on.” This might be a Klon Centaur, an Xotic EP Booster, or my brand new Singer Overdrive, designed specifically as an ideal stacking tool. It has a relatively transparent tone with smoothness and low gain.
Still, nothing prevents you from placing your booster before your gain pedals. This is where the Singer’s active EQ really shines: boosting mids and cutting lows creates a sharp and punchy tone, perfect for pushing the following pedals. It’s no coincidence that the Tube Screamer is often used to drive high-gain amps in metal: with gain at minimum and volume at maximum, it acts more as a boost and EQ than as a real overdrive. Yet it provides the precision and attack this style demands!
Whether you’re using two gain pedals or more, it’s essential to try different combinations to find what works best for you. I suggested starting with the most saturated and ending with the least, but you can just as well reverse the order, or even place a high-gain pedal in the middle, boosted from the front or tamed afterward with milder pedals.
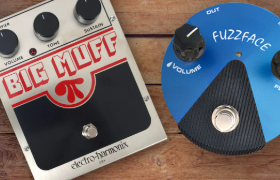
You can also stack fuzz before overdrives for a warm, sustaining tone, or after them for pure signal destruction. In reality, there are no fixed rules—it’s up to you to discover the perfect chain.
I hope this short article helps you better understand the subtleties of gain staging and stacking, and that you’ll enjoy experimenting with different combinations! Have fun with time-based effects to create layers, ambiences, or unique textures, or with compressors to give your tone a more produced feel. And remember, stacking gain pedals—the most common use—will often push you to keep gain low and experiment with order. Gain staging is the key, so learn to balance gain and volume to get the best out of your pedals! If you’ve found your favorite combination, share it in the comments! And if not, the Singer Overdrive will be glad to help you in this quest.
Posted in:
Saturation effects,
Overdrive,
Time-based effects,
Distortion,
Preamps,
Delay,
Reverb,
Pedalboard tips,
Compressor
Related posts
-
 Different flavours of overdrive
Overdrive definitely is the queen of saturation effects. There are so many ofthem though, how can you be sure to...Read more
Different flavours of overdrive
Overdrive definitely is the queen of saturation effects. There are so many ofthem though, how can you be sure to...Read more -
 The truth about transparent overdrive
In this article, I talk about the concept of transparent overdrive, and why this designation became a marketing...Read more
The truth about transparent overdrive
In this article, I talk about the concept of transparent overdrive, and why this designation became a marketing...Read more -
 Understanding saturation effects
Saturation effects are many : distortion, fuzz, overdrive, preamps... What should you look for on the market today ?Read more
Understanding saturation effects
Saturation effects are many : distortion, fuzz, overdrive, preamps... What should you look for on the market today ?Read more -
 The wonderful world of fuzz
Are you often left scratching your head when talking about fuzz ? Read our guides and understand the main differences...Read more
The wonderful world of fuzz
Are you often left scratching your head when talking about fuzz ? Read our guides and understand the main differences...Read more -
 The tone of the RAT
The ProCo RAT is one of the most known distorsion pedal. Learn about its tone and history here !Read more
The tone of the RAT
The ProCo RAT is one of the most known distorsion pedal. Learn about its tone and history here !Read more
Leave a comment
Comments
instructif
By: Fabrice Bertaina On 10/22/2025top merci, test à réaliser